Launch Amazon AWS Instance Using AWS CLI

Task Objective:-
Statement: From the given Requirement Launch an EC2 instance from Windows Command Prompt.
Requirement :
🔅 Create a key pair.
🔅 Create a security group.
🔅 Launch an instance using the above-created key pair and security group.
🔅 Create an EBS volume of 1 GB.
🔅 The final step is to attach the above created EBS volume to the instance you created in the previous steps.
What is Key-Pair?
A key pair, consisting of a private key and a public key, is a set of security credentials that you use to prove your identity when connecting to an instance. Amazon EC2 stores the public key, and you store the private key. You use the private key, instead of a password, to securely access your instances. Anyone who possesses your private keys can connect to your instances, so it’s important that you store your private keys in a secure place.
What is the Security Group?
A security group acts as a virtual firewall for your EC2 instances to control incoming and outgoing traffic. Inbound rules control the incoming traffic to your instance, and outbound rules control the outgoing traffic from your instance. If you don’t specify a security group, Amazon EC2 uses the default security group.
What is the EC2 Instance?
An instance is a virtual server in the AWS cloud. With Amazon EC2, you can set up and configure the operating system and applications that run on your instance.
What is the EBS Volume?
Amazon Elastic Block Store provides raw block-level storage that can be attached to Amazon EC2 instances and is used by Amazon Relational Database Service. Amazon EBS provides a range of options for storage performance and cost.
Let’s Get Started
To Perform this practical you need the AWS CLI package and after install gives that path to the Environment variables in the system.
Install the software from this link:
https://awscli.amazonaws.com/AWSCLIV2.msi
Step 1. Get your AWS login credential or create IAM users and take that user's credentials to log in to AWS Account from CMD.
Type the following command to enter your credentials.
aws configure
I have already entered so it showing like this otherwise you have to fill there.

Step 2. According to the requirement, we need to create key Pair
To Cerate Key pair we need to type Following Command.
This command has some arguments so the following are the arguments :
-- key-name “any key name”
aws ec2 create-key-pair -- key-name “KEY_Name”

Step 3. According to the second requirement, we need to create a security group.
To Create a Security Group we need to type Following Command.
This command has some arguments so the following are the arguments :
-- description “small description about SG”
-- group-name “any name to SG”
-- vpc-id “your vpc id”
aws ec2 create-security-group -- description “little description” -- group-name “any name” --vpc-id “your VPC id”

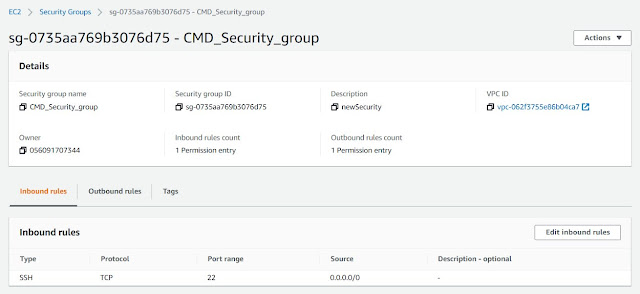
Now we have to set some protocols so specific users can connect instances through SSH.
you can see we have allowed all the traffic from all IPs from port 22 so anyone can connect to instance you can give specific IP to allow as well.

Step 4. Now Launch an instance using the above created key pair and security group.
To Launch an instance we need to type Following Command.
This command has some arguments so the following are the arguments :
--image-id “Image id get it from UI”
--instance-type “any flavor of instance Ex. t2.micro”
--key-name “your Key Name”
-- security-group-ids “ security group id”
--subnet-id “your subnet id”
-- count “number of instances”
aws ec2 run-instances -- image-id “Image id get it from UI” -- instance-type “any flavor of instance Ex. t2.micro” -- key-name “your Key Name” -- security-group-ids “security group id” -- subnet-id “your subnet id” -- count “number of instances”
The state showing as “Pending”.

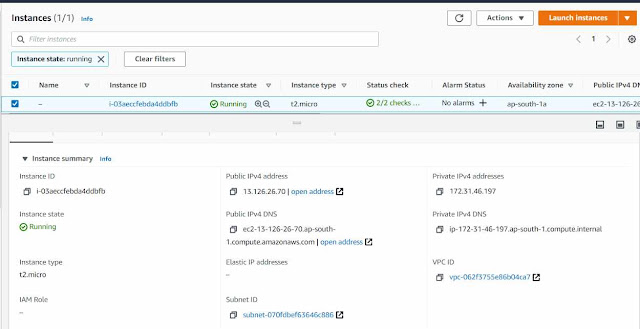
Now the state changed to “Running”.

Step 5. Now we need to Create one EBS Volume to attach as an extra volume to the above-launched instance.
To Create a volume we need to type Following Command.
This command has some arguments so the following are the arguments :
-- availability-zone “your AZ”
-- volume-type “volume type Ex. gp2”
-- size “size Ex. 1gb,2GB”
--tag-specification ResourceType “resource type”,Tags=[{Key=name,value=”Volume name any”}]
aws ec2 create-volume --availability-zone “ap-south-1a” -- volume-type “gp2” --size 1 --tag-specifications ResourceType=”volume”,Tags=[{Key=name,Value=CMD_Volume}]

Step 6. The final step is to attach the above created EBS volume to the instance you created in the previous steps.
To attach a volume to an instance we need to type Following Command.
This command has some arguments so the following are the arguments :
-- instance-id “your instance id”
-- volume-id “your volume id”
-- device “/dev/device name Ex. sdh”
aws ec2 attach-volume -- instance-id “your instance id” -- volume-id “your volume id” -- device “/dev/device name Ex. sdh”
The State is “Attaching”.

Now the status is “ok” which means we have successfully attached.

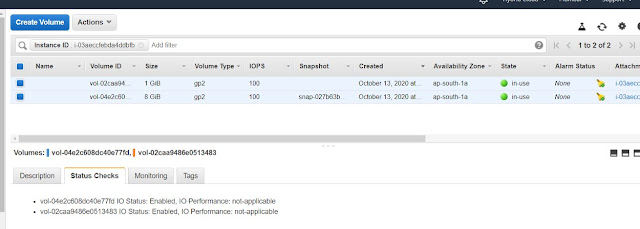
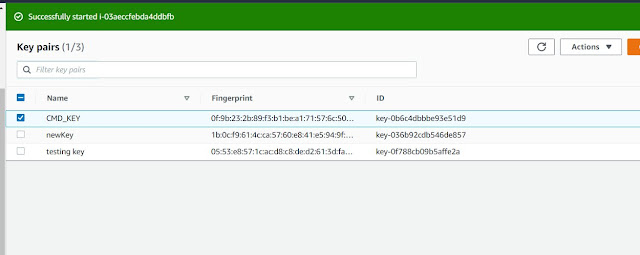
Now live screenshots of Web UI.
Conclusion:-
With the help of the amazon CLI package from the command prompt, we have launched an amazon EC2 instance and also we have applied all the necessary concepts.
Thanks! to Mr. Vimal Daga for Teaching us such a great thing.


No comments